Navy Ponte Jacket - SWAP Wardrobe
- Jan 2, 2024
- 6 min read
LONDA'S SWAP Wardrobe - Installment #1
I've been promising this SWAP (Sewing with a Plan) Series for awhile now... so to start off 2024, I'll begin with this 1st LONDA'S SWAP Installment.
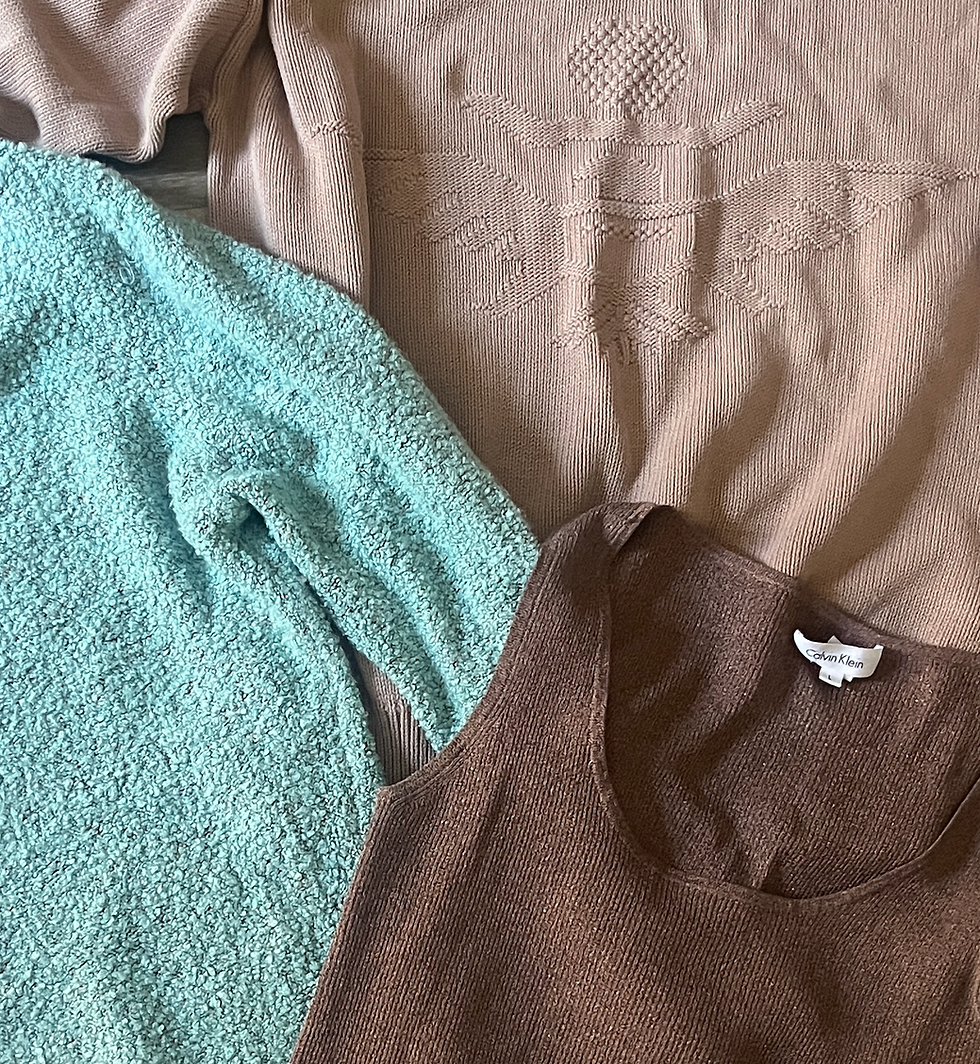
Below, I have pictured all 13 garments + accessories I actually stitched - a Bus Trip to Washington, DC being my 'excuse' for creating some new clothes! Sorry they are all 'posed' on my Studio floor, but for now, that's the best I can do. Don't miss my 'helper', Musty - my new most wonderful feline helper!!!
Sew: that is 13 garments SO FAR - as I still have some size-able pieces left begging to be fashioned into yet a few MORE pieces....

A pivotal piece in my new SWAP (Sewing with a Plan) Wardrobe is this great Navy Jacket - shown here on my Fabulous Fit Dress Form - which I LOVE by the way! If you want to treat yourself, I highly recommend this brand - as it is top quality, and you can even order it with a shell and a wide variety of 'pads' to make it more like 'you'. I have a Duct Tape Double - but honestly do not like it, as I can't pin into it with all that Duct Tape. It is in my garden shed right now - perhaps to become a stylish Scarecrow some day? HERE is the link to the Fabulous Fit Dress forms. Fitting note: on my body, the center front of the jacket hangs perfectly straight - YEAH!

I did some serious thinking about the style and length of this jacket. The main determining factor is that I came to realize that I have NUMEROUS scarves that I can wear with all the pieces of this wardrobe mix n' match.... and I have come to HATE buttonholes - both stitching AND using, so I determined I wanted this jacket to meet at the center front, but NOT to actually close. But, I also wanted some kind of collar - so I ended up combining 2 different patterns, AND making a test jacket before cutting into the AMAZING Ponte Knit. (I blogged on the 2 Ponte Knit fabrics at this post: https://www.londas-sewing.com/post/loveliest-ponte-knit-i-ve-ever-found I find as of this date: 1-2-24, there are 3 colors available: White, Navy and Green (the Navy and Green being the ones I used). Or os a blend of 47% Modal (a rayon), 45% polyester, 6% Spandex. If you want a nice White Pant, I feel this is a very opague fabric that would do well.
TEST JACKET - A SUCCESS!
Vogue 7975 is a classic princess line (to the shoulder) that I desired - Channel style body.
Burda 4257 was quite old, but had the collar for which I was looking. Being old, the armholes were deep and the body was VERY boxy - NOT what I was looking for. Therefore - I 'married' the two together, using the Front Facing superimposing it over the front of the Vogue. I also adapted the neckline edge of the Vogue to match that of the Burda so that the Burda Collar would work. Sounds simple, but I sure had to keep my thinking hat on - so for SURE, I knew I needed to TEST my new 'pattern'.

And... here is my successful result - of a fabric I had on hand - and wore at summer's end, quite enjoying it as well.

CONSTRUCTION NITTY-GRITTY
For accurate Collar Corners - of a fairly bulky fabric. I've learned it pays to take time to actually MARK the corner intersection, then take a DIAGONAL stitch across the corner. On my Navy jacket, my stitch length was 3.0 since it was a knit fabric, and dense as well.


Grade the seams. I'll always remember when I took a class from Judy Barlup when she explained that the 'Public' side's seam allowance is the one to leave the widest. That makes sense to me - and I hope to you as well. The pictures below show that and more.
Picture 1: this is the lower part of the front edge of the jacket being trimmed more - leaving the jacket seam allowance below the collar turning point the longest. In this case, I elected to interface only the Front Facing - as that was the 'surface' that actually creates the outer side of the 'collar'. The collar pattern shown above is really the UNDER Collar.
Picture 2: this is the upper part of the jacket front - where it is the interfaced FACING that is interfaced and will be come the outer 'Collar' as explained above - THAT one is what is left longer in this case, as it is the 'Public Side's' seam allowance. You must realize that where the collar 'turns back' - or the Front Facing actually becomes the outside of the Collar, that the trimming changes.

Picture 3: Claire Schaeffer herself gets credit for convincing me of the necessity of ALWAYS PRESSING OPEN ANY SEAM ALLOWANCE WHERE THE SEAM WILL LIE ON THE EDGE. Claire taught me SO much when she visited my shop back in 2003 and I'd been sewing for years and years at that point. Believe me, I teach this firmly today to my students here at the Sunroom Sewing Studio. It DOES work like a charm - though t may seem silly at the time. Note also that a Point Presser is truly the only way to get into the corners to press seam allowances open. OH - and don't be a 'Chicken Clipper' - when it comes to trimming the excess fabric at ANY and EVERY corner where two stitching lines are intersecting.


I ALSO came to realize from Claire that when only ONE seam intersects a corner, to NOT trim that corner - as the seam allowance is NEEDED to support the corner. That was not 'the case' on this jacket, but.... I am always 'teaching'....
For more clarity on these points, made a pretty good video. Here it is....
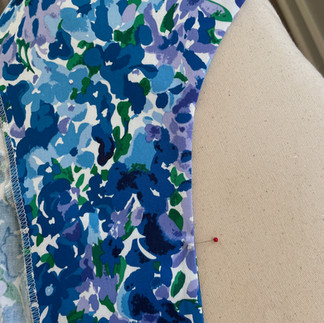
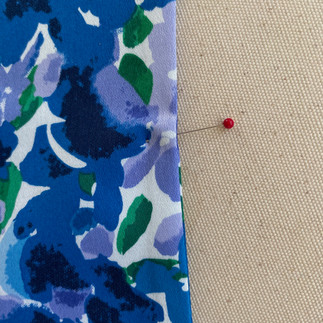
Pressing is ALL IMPORTANT - 'FAVORING' the 'Public Side' so that the edge seam actually is rolled to the UNDERSIDE. The seam line actually does NOT END UP ON THE EDGE, but because you pressed it open, you can 'boss it around', to lie where it is on the NON Public side, 'hiding' it. See the pictures below. I always press with the UNDER side 'up' at the ironing board. The pin in the pictures indicates that 'collar termination point', where the collar starts to 'form' or turn back, revealing the Front Facing.


If this kind of 'nitty gritty' sewing stuff is a mystery to you, I DO offer Sewing Retreats here at my Sunroom Sewing Studio in west TN, between Memphis and Nashville on I-40. Read about it HERE- a GREAT DEAL at just $249/person/day! Maybe time to treat yourself and a friend in 2024?
Topstitching Tips I ALWAYS have the 'public' side UP at the machine when adding topstitching. Nothing will keep edges where they belong better than accurately-placed topstitching. Put that NEEDLE POSITION capability on your sewing machine to work!!!
Another video will make it clear... so I've added it below. First, some pictures of my topstitching on the Navy Jacket.


Picture 1 above - shows my settings: Width means that I've moved the needle one notch to the right of center, as I wanted THAT precise placement if I guided the fabric edge at a certain place on the throat plate.
Picture 2 - shows that I took time to HAND baste it all BEFORE stitching by machine. Silk Thread is the BEST for this - stitches in like butter, and will not 'impregnate' the edge when pressed.
Picture 3 - shows my topstitching. I removed the hand basting BEFORE pressing, and then used a silk organza press cloth to protect the surface of my lush fabric.
BREAK Topstitching at the Collar Termination Point, as remember, I always have the 'public' side ON TOP when executing TopStitching. Leave long threads, then pull to one side (I pull the top threads to the bottom, then 'bury' them. Another video will explain better.....

SWAP Installment #2 will be on the 'Green' Ponte Jacket and One Seam Pants.
I welcome your comments below with any and all input. Back to sewing - even if it IS some alterations for a friend!
FRIENDLY TIP - there are AWESOME DEALS on the remaining Sewing Notions here on my rack at the Studio. Find them AND lower than fabric cost GARMENTS at my CLOSE-OUT Department!
ON top of that - a FREE BONUS of my Creative Jacket Journey DVD on how I transform sweatshirts into STYLISH Jackets, and my Book 2 on the same thing
will be tucked in with EVERY ORDER!!!


Comments