How to Use Pattern Templates – Londa’s Terrific ‘T’ Knit Top
- Londa
- Sep 10, 2014
- 3 min read
I’ve just published a NEW wonderful BASIC KNIT TOP Talking Pattern™! I did so because I just couldn’t find EVERYTHING I wanted in one pattern, and since the rest of my ‘Top Priorities’ knit pattern line all show great, EZ techniques/changes to a basic knit top pattern to create many different looks, I decided to ‘bite the bullet’ and come out with my own! However, let me share – it wasn’t really on my own. I couldn’t have done all the technical drafting/grading/tiling for PDF, etc without the help of a great company that offers those services!
Any way – I digress. Since I wanted to offer so many options on one pattern: 3 necklines, 5 sleeves, darted and without dart, SX – 3XL sizing….. AND still keep the pattern at my $15 price level by keeping to the available square feet of space at McCall’s for the tissue printing AND to INCLUDE my personally-recorded directions online ‘Talking Pattern’ which takes hours an hours and hours of work, it was necessary to use ‘templates’ for some of the pattern feature options.
Yesterday, I decided to ‘preserve’ my pattern pieces with fusible interfacing because I KNOW it will be such a staple in my pattern wardrobe. I recommend you do this for all of your ‘staple’ patterns – ones you use ALOT.
1. Lay fusible interfacing sticky side up, and pattern pieces wrong side down. Trim around the pattern cutting out the fusible. Fuse with a temp just high enough to do the fusing. On my Terrific ‘T’ pattern, assuming you tape the sleeves together (comes in 3 pieces), to get a full length sleeve, first do this, but put the tape on the BACK side of the pattern tissue since paper wrinkles when heat touches tape. You could also just lay the pieces together as you fuse…. Duh – why didn’t I think of that while I was doing it??? I love Red Dot Tracer, but for the entire pattern pieces themselves, I like doing what I just described, a s that preserves ALL the nice printing on the pattern tissue. But, I will use Red Dot Tracer for the Templates as you’ll see.
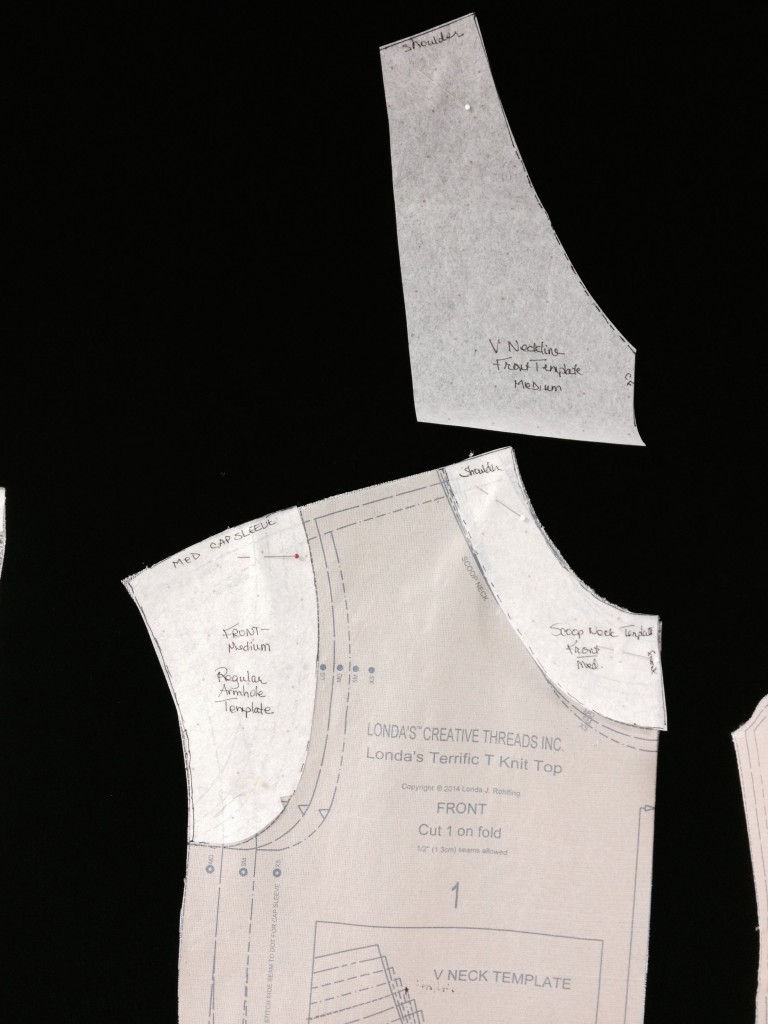
So – here, pinned up on my ‘wall’ of black velvet hung on the wall of my basement ‘studio’, right by my cutting table you can see the pattern pieces to Terrific ‘T’. Left to right:
Darted Front, Back (showing armhole template and scoop neckline template, , Front without dart with armhole and scoop neckline templates and the V neck template on top of row, Sleeve .

2. To obtain those ‘template’ pieces, I just traced them onto Red Dot Tracer to make separate ‘pieces to lay on top of garment, then to cut around. Read on…it will be come clear. See below a closeup of the templates. Note how I have labeled the edge of them appropriately, so I know how they will go onto the pieces to ‘use’. AND, of course, be sure to trace the appropriate SIZE!

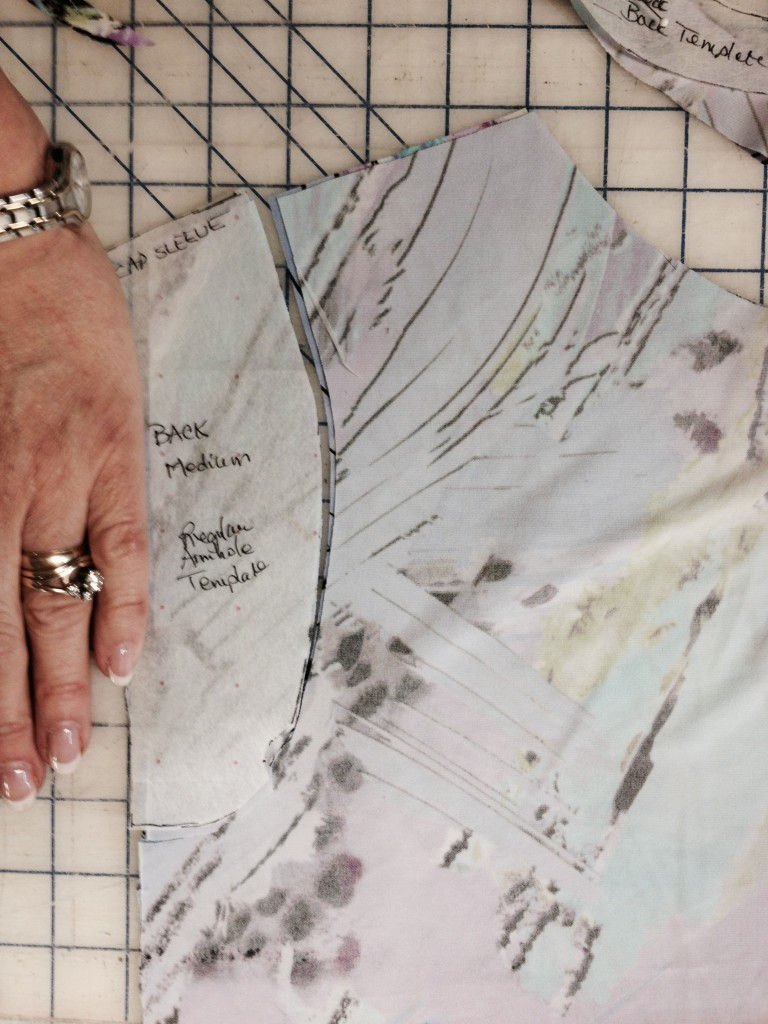
See then how I’m using the armhole template. The pattern as I cut it out on the external most line was for the Cap Sleeve. The top I’m making will have set-in sleeves, so that’s why all I have to do is to lay the Armhole Template on the edge and cut off the excess ‘fabric’. Yes, I know that’s a bit of waste of fabric, BUT most knits are 54-60″ wide, and take only the length of the Top plus the length of the Sleeve in yardage, so the little bit of fabric this technique ‘wastes’ is not a big deal – it wouldn’t be used for anything else anyway. You can see in the upper right hand corner how, similarly, I used the Back Scoop Neck Template to cut down the back neckline.

Simple? Yes – but I decided it was worth a ‘post’ because there are so many NEW garment sewers out there. Speaking of new sewers, let me brag on my Talking Pattern™ system! In ADDITION to the printed booklet (PDF -= you print it, Printed – I ship it to you), INSIDE the printed booklet, you’ll find a URL (and sometimes a password). When you type that into your browser bar CORRECTLY, you will come to a page(s) where you can both SEE a large color photo of that step AND if you click on the audio bar and have FLASH installed you can HEAR me talk you through that step! How cool is that? If you click HERE, you can see ha FREE sample of how this works…….


Comments